
This guide is intended for when you get SSL unverified peer error during setup and are using the self-signed certificate solution in sys-API (the default).
Please note that using properly signed certificates is better. And to terminate SSL in a reverse proxy infront of sys-API instead of inside sys-API. This is only put in place to lower the barrier of entry for encrypted traffic between the client and the server.
Preface
During first startup, sys-API will generate a self-signed certificate to use with HTTPS. The certificate used is stored in keystorewww.jks. The .crt files are just there for convenience and portability.
When creating the server certificate, sys-API will call https://ifconfig.me to retrieve the public IP to populate Common Name(CN) and then list the servers local ipv4 addresses and put those into Subject Alternative Name(SAN).
On the app side; when adding a server, Monitee will only accept the self-signed certificate if either the hostname or the IP addresses in the Common Name and Subject Alternative Name match with the IP or hostname you are trying to connect to.
1. Confirm that CN and SAN match
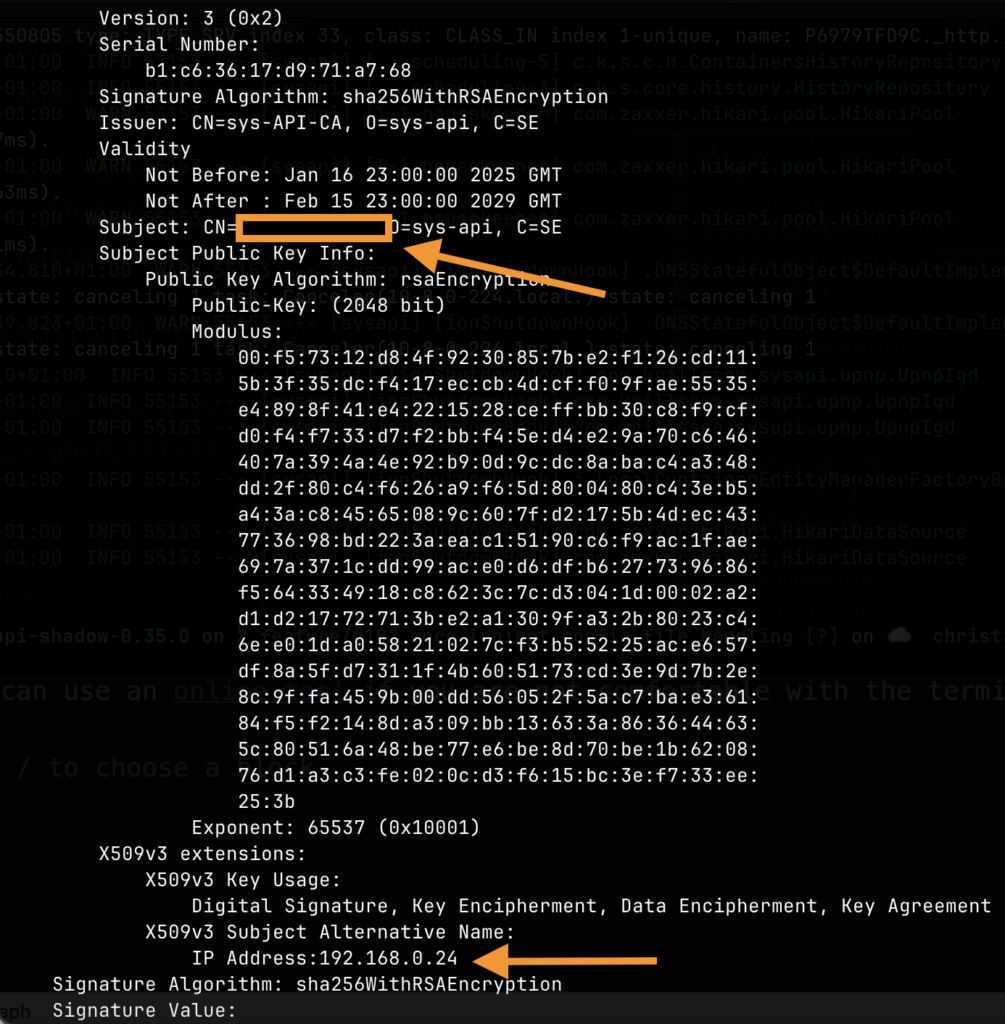
Use a tool to preview the cert and see that the info matches with what you are trying to connect to. Look inside the self_signed_server.crt file in the data directory.
openssl x509 -in self_signed_server.crt -text -nooutYou can use an online tool if you are not comfortable with the terminal.

2. Regenerate the certs manually
If the ipv4 or public IPs don’t match, we need to regenerate the cert files and add the server again.
Disable the automatic population of CN and SAN and specify those yourself
selfSignedCertificates:
  enabled: true
  ## automatically put external IP in CN
  populateCN: false
  ## automatically put internal IPs in SAN
  populateSAN: false
  ## manually populate CN and SAN below
  commonName: mydomain.com # or public IP
  subjectAlternativeNames: [192.168.0.24, 192.168.0.25]
Then delete self_signed_ca.crt, self_signed_server.crt, keystorewww.jks from the data directory.
Lastly, restart the server and let it re-generate new certificate files.
Adding the server with HTTPS should now work.
If, for some reason it still won’t work. You can email me logs from the About screen. Also make sure to provide a screenshot of the dialog that appears when you click the READ MORE button shown in the screenshot at the top of this page.